Raymarch material generation in UE5
Custom editor adjustments, generating materials and modular raymarching in UE5
Initially this project was meant for some editor and slate programming.
With the Unreal Engine 5 preview being available now.
Starting of this was indeed what I was doing, with the ultimate goal being able to use compute shaders.
But I stumbled into raymarching instead and some very specific corners of the engine.
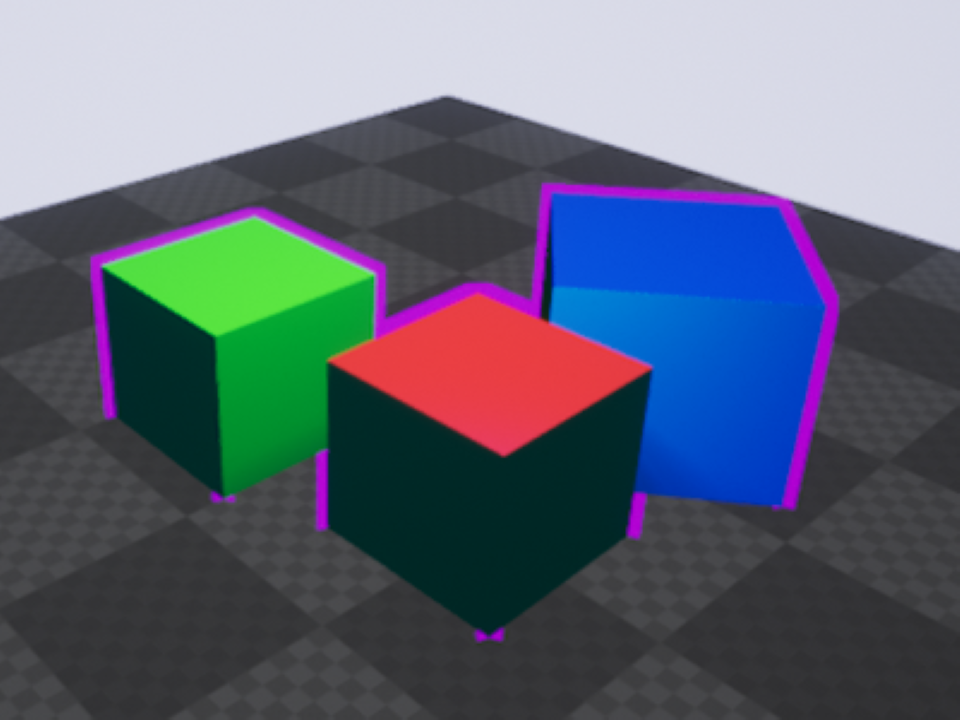
Custom materials and physics shapes rendered using a postprocessing material that is raymarching.
Editor changes
To start of some changes were made to the editor. In particular
to do with importing new file file formats. Using new file
factories to parse and store the data in ".uasset"'s.
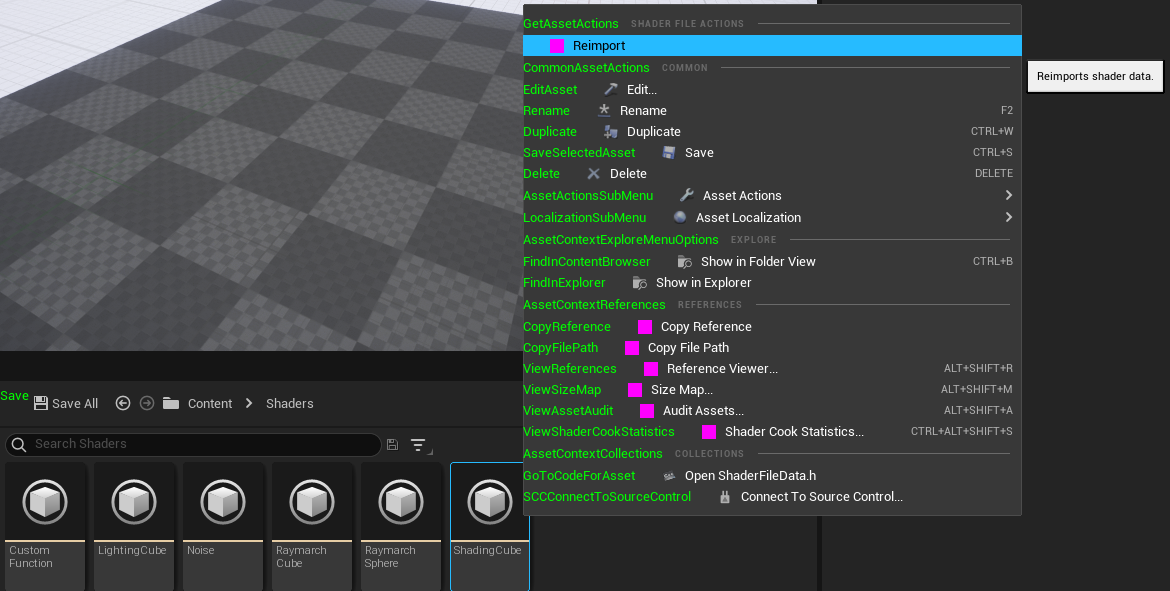
The new files that were being imported are the 2-shader file
types supported by Unreal: ''.ush', ''.usf'. The shader code
is simply being stored as one string. An editor button was also
added to force a reimport of the file.
The reason these files were made to be imported though was for
the customshaderexpressions. In the material graph of Unreal
you are able to type hlsl-code in a small and clunky text box.
So to improve ease of use and maintainability a derived class
was made of said expression that accepts a shader-file instead
of text.
Raymarching
Raymarching is a rendering technique similar to raytracing. Although
with the crucial difference that the closest distance to each shape is
calculated. The smallest of which is used to take a step forewards, untill
we can determine a shape is clase enough to the new point.
This can be simple enough to set up in HLSL but for the material graph in
Unreal this is a bit difficult. As it doesn't support for loops through
nodes. We can however use for loops in customexpression where we can
simply place some HLSL code. Now we can render a shape quite easily.
There is one limitation though and that is the fact that our shadercode
is rigid, in other words not modular. So to get around this we split our
shader code up into separate parts: marching step, lighting step and the
shading step. Doing this we can much more easily add as many shapes as we
want. While also avoiding a lot of the expensive marches it would have to
do with all of the shapes in one shader.
Material generation
With the new shader file type and a new customfileexpression type
that can be used in the material graph we can move on to the next
subject. Material generation, very specific but you will soon see
why we do it though.
Everything in the material graph has a C++ counterpart, hence we
are able to create a fully functional graph through code. It is
very obvious though why the graph exists in the first place. It is
simply tedious to do it this way but offers us great result once it
is set up properly.
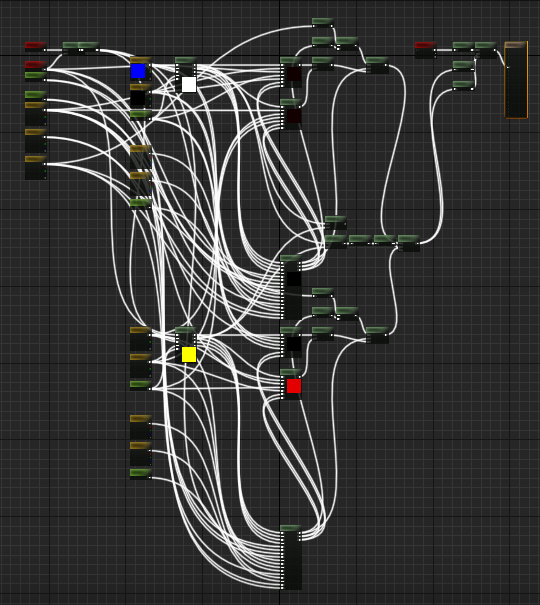
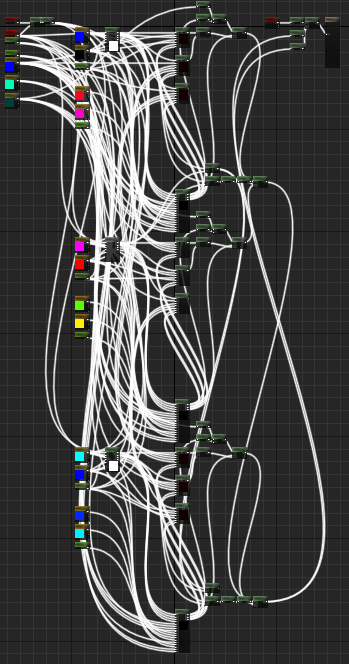
The main issue that will mostl likely persist is the spagettification
of your graphs. Unless you add specific rerout nodes to clean up
the graph you are left with a big visual mess.
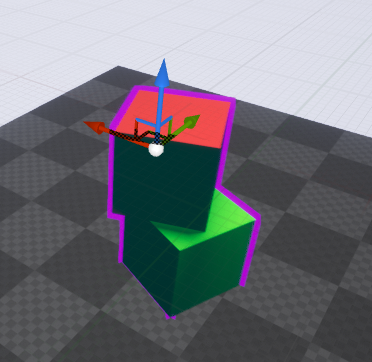
Physics
In the end we had our shapes that could be rendered but that is slightly boring.
Also, it is hard to play around with and discover bugs etc. in the shaders.
Therefore, the material was upgraded to a dynamic one, in which we update the
position and rotation of the shapes. The physics of the shapes can be a custom
collider. Although for shapes that are constantly changing thos might be a bit harder.
But for simple geometric shapes like cubes, spheres, capsules and so on the default
colliders will do.
I also added the collider debug lines to make debugging somewhat easier. In the future
adding a sphere or actual light where the raymarched light is could also be handy.
On the bottom you can also see a little funny issue encountered along the way, in
which the rotation calculations being used had some issue.
Editor preview
An additional feature that I thought was neccesary was the preview mode.
When the mode is enabled it shows the initial positions of the shapes
and only does so when the game isn't running in editor mode.
This was a bit more annoying to do then first anticipated. Due to the
rigid nature of how editor settings work on a basic level. While in Unity
for example adding additional editor functionality is straight forwards,
here that isn't quite the case. You can still get around this though, by
using the c++ extending slate code. Slate is the "pure" form of everything
in the engine, writing something in slate is equivalent to describing the
UI.
Also since Unreal doesn't really have a method meant for drawing gizmos
for every tick or any editor tick function. I had to add said functionality
to one of my classes, using some precompiler statements and inherited
functions.
Click here below to take a look at the source code: